
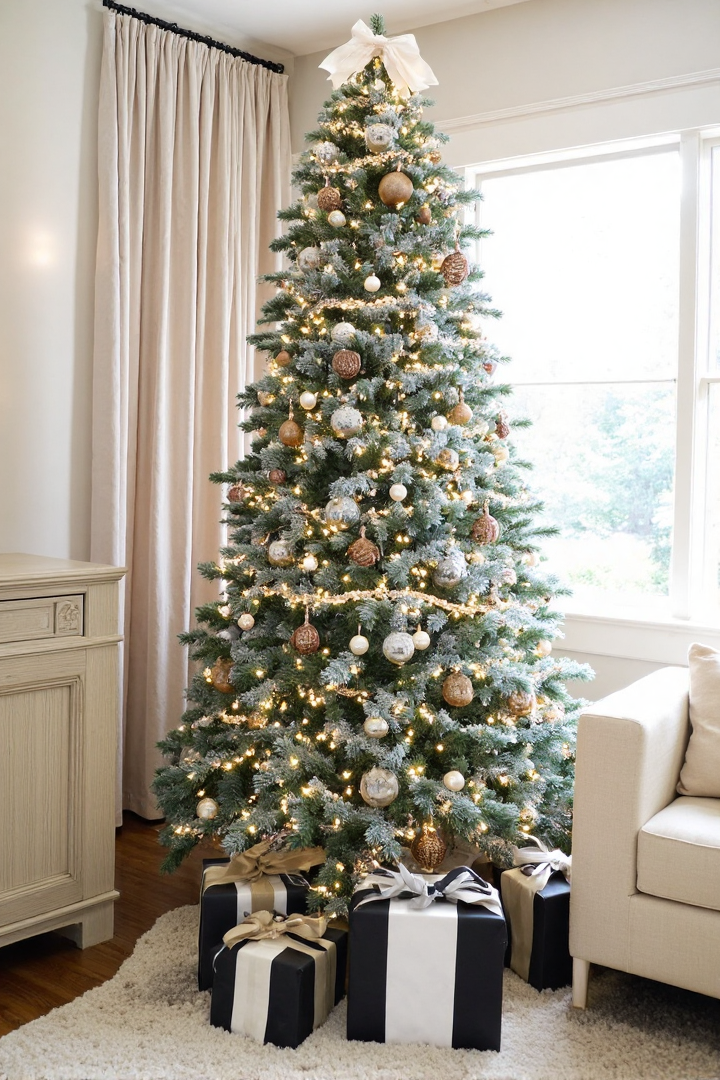
Creating an aesthetic Christmas tree isn’t just about hanging ornaments — it’s about designing an experience. Each decision, from the type of tree to the finishing touches on your presents, contributes to the overall mood. Think of your tree as the centerpiece of the season: it anchors your home, reflects your style, and creates lasting memories.
Here’s how to build one from the ground up.

1. Choose the Right Tree
Your tree is the foundation — like a canvas before paint. If it’s sparse, too small, or clashes with your room, no amount of decor will fix it.
- Size: Ideally, your tree should be about 12–18 inches shorter than your ceiling. This gives it presence without overwhelming the room.
- Shape: Go for a full silhouette for classic impact, or a slim tree if your space is small.
- Real vs. Faux:
- Real trees offer scent and tradition, but they shed and require care.
- Faux trees allow consistency, customization (flocked, slim, full), and longevity. A high-quality faux tree is an investment that pays off year after year. Plus, it’s better for the environment!
Why it matters: The tree’s shape and fullness determine how well lights, ribbons, and ornaments layer. A sparse or undersized tree will always look unfinished.


2. Select a Cohesive Color Palette
A tree without a palette feels chaotic. This is where your tree becomes styled rather than “decorated.”
- Neutral Organic: White, beige, taupe, soft gold. Serene and timeless.
- Warm Metallics: Bronze, champagne, copper, gold. Cozy and luxe.
- Minimal Scandinavian: White, clay, wood, linen. Clean and earthy.
- Winter Glam: Silver, crystal, frosted glass. Sparkling elegance.
Pro tip: Stick to 2–3 main colors and one accent. This keeps the look cohesive. Too many colors dilute the impact and make the tree look busy.
Why it matters: Your palette creates visual harmony. Every ornament, ribbon, and present should tie back to it so the tree feels like part of your interior design.

3. Layer the Lights
Lighting sets the mood — it’s the glow that makes your tree feel alive. If you already have a pre-lit tree, skip this step and move on to step 4.
- Warm white fairy lights are the most timeless. They add a cozy, golden glow that flatters every style.
- Placement technique: Instead of wrapping lights only around the surface, weave them in and out of the branches. Start deep near the trunk, then bring them forward.
- Amount: About 100 lights per foot of tree height for an even glow.
Why it matters: Lights are the base layer that everything else builds on. When placed with depth, they give your tree dimension — ornaments sparkle, ribbons glow, and the tree feels three-dimensional rather than flat.

4. Add Ribbon or Garland
Ribbon is your tree’s flow. It guides the eye and ties the color scheme together.
- Materials: Velvet for luxury, linen for organic warmth, satin for elegance, metallic mesh for sparkle.
- Technique: Don’t wrap ribbon tightly around like a candy cane. Instead, tuck it in and let it billow naturally, weaving in loose zigzags from top to bottom. Use wire-edged ribbon to shape it.
- Layering: Combine a wide ribbon (for statement) with a narrow ribbon (for detail).
Why it matters: Ribbon acts like brushstrokes on your canvas. It softens transitions between ornaments, fills visual gaps, and adds movement to the tree. Without it, trees can feel static and pieced together.
Brown Velvet Ribbon
Gold Beaded Garland
Thin Brown Ribbon


5. Ornaments: The Main Event
This is where your personality shines. Ornaments are not just fillers — they create rhythm and richness. It’s important to note that you only need one selection in each size. This ensures the tree will look full and cohesive without feeling too cluttered.
Step A: Start with Large Ornaments
- Place oversized ornaments deep into the tree to add depth. Think of them as your anchor points.
- Use them to establish your palette early on.


Step B: Layer with Medium Ornaments
- Spread these evenly across the tree.
- Arrange in triangles (three ornaments of the same color spread in a triangular pattern) for visual balance.


Step C: Finish with Small Ornaments
- Use these to fill gaps.
- Choose varied textures: matte, frosted, shiny, wooden, or fabric.
Why it matters: Ornament layering prevents the “cluttered” look. Large ornaments create scale, mediums provide balance, and smalls add texture. It’s the difference between a designer tree and a rushed one.

Mini Acrylic Hanging Ornaments
6. Bring in Natural & Personal Elements
An aesthetic tree doesn’t have to feel sterile. Adding organic and personal touches keeps it warm and memorable.
- Organic Additions: Pinecones, eucalyptus sprigs, or pampas grass.
- Textural Elements: Clay, wood, rattan, or fabric ornaments.
- Sentimental Touches: Incorporate a few handmade or personal ornaments so the tree feels like yours, not just staged.
Why it matters: Natural elements connect your tree to your home’s textures, while personal touches prevent it from feeling like a showroom. It’s where warmth meets style.

7. Choose a Thoughtful Tree Topper
Skip the oversized plastic star. A topper should complement, not dominate.
- Minimalist Star: Simple, metallic, modern.
- Floral Arrangement: Dried pampas, eucalyptus, or festive sprays.
- Ribbon Cascade: Ribbons flowing upward for softness.
Why it matters: The topper is the finishing note. It should feel like a continuation of your design language, not an afterthought.


Left – Gold Ribbon Topper
Top Right – Glitter Snowflake Topper
Bottom Right – Classic Gold Star Topper
8. Style the Tree Base
The base grounds your tree. A messy stand or clashing skirt can undo all your work.
- Tree Collars: Woven rattan, wood, or metal for a modern polished look.
- Tree Skirts: Chunky knit, linen, or faux fur for softness.
- Pro move: Layer both — a collar with a fabric base peeking out.
Why it matters: The base sets the tone for the entire bottom half of the tree. Since gifts will sit here, it frames them beautifully and keeps the aesthetic consistent.


9. Wrap Cohesive Presents
Even if they’re empty, styled presents complete the look.
- Paper: Kraft, linen, metallic, or textured neutrals.
- Ribbons: Velvet for luxury, silk for softness, twine for rustic.
- Finishing Touches: Mini pinecones, sprigs of greenery, or wax seals.
- Stacking: Vary sizes and heights for dimension.
Why it matters: Presents are part of the tree styling. They extend your palette downward and tie the base into the overall design.


10. Extend Styling Beyond the Tree
Your tree is the star, but the supporting actors make the scene.
- Style nearby surfaces — consoles, mantles, or coffee tables — with matching greenery, candles, or metallic accents.
- Add cozy layers like blankets, pillows, or rugs in complementary tones.
- Use mirrors to reflect the tree lights and amplify the glow.

Why it matters: This creates continuity. Instead of one decorated corner, your entire room feels intentionally styled, wrapping your space in holiday atmosphere.
Final Thoughts
Building an aesthetic tree from scratch is like curating an art piece. Every layer — tree, lights, ribbon, ornaments, natural accents, topper, base, presents, and surrounding decor — plays a role in creating harmony.
When done thoughtfully, your Christmas tree won’t just look pretty. It will tell a story, elevate your space, and feel like a magical centerpiece for the season.

Happy Holidays and share your aesthetic tree with us!
This post may contain affiliate links. If you make a purchase through these links, we may earn a small commission at no extra cost to you.